Five tips when choosing a diesel or electric pump


Every dewatering project will invariably demand a specific priority – such as the volume to be pumped, the amount of solids in the liquid, emission limits or performance; meeting this need requires a grasp of diesel and electric pumps’ comparative advantages.

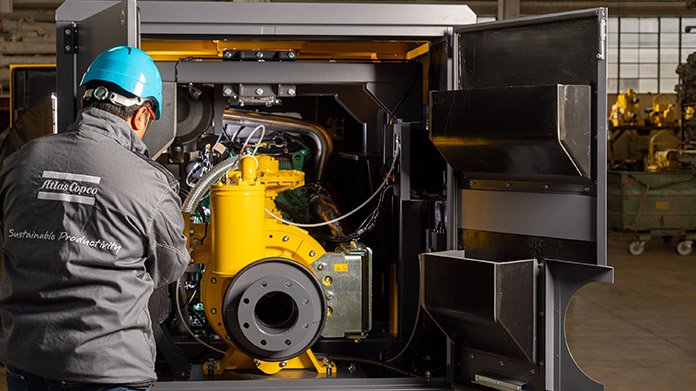
According to Steve du Toit, product manager at IPR, there are five main considerations to bear in mind. As a leader in dewatering solutions with over 16 years in the business, IPR was recently appointed as the master distributor in Southern Africa for Atlas Copco dewatering pumps. IPR carries a wide range of diesel powered and electric Atlas Copco pump solutions, for purchase and for rental.

“The first consideration is usually the volume of water to be discharged, and this relates to the power and flow of the pump,” says du Toit. “Atlas Copco’s diesel-powered centrifugal pumps are designed for high volumes – with a typical flow range of 10 to 1500 cubic metres per hour.”

Related to the pump’s power is the head it can achieve, which for these pumps can reach over 50 metres. He notes that the pumps are also able to operate in a variable speed range, so they can manage different flow-head combinations.

“By way of comparison, electric submersible pumps can offer power ratings up to around 80 kW and can typically manage flows up to 20,000 litres per minute with a maximum head of 85 metres,” he explains. “This range is typical but there are some higher head pumps also available.”

The second consideration is the amount and nature of solids in the water to be pumped. Diesel driven centrifugal pumps can manage both clean and dirty water as well as water carrying trash and fibrous materials. Thanks to features such as semi-open impellers and abrasion-resistant pump casings, these pumps can handle solids up to 76 mm in size.

“In contrast, electric submersible pumps have the ability to handle abrasive materials and solids up to 12 mm – or even higher with sludge pumps,” he says. “When a project involves the pumping of suspended solids, it is ideal to equip the pumps with hardened impellers.”

Thirdly, it is important to consider the application’s particular limitations; underground mining, for instance, will usually require the units to be easily portable and to have no emissions. This makes electric submersible dewatering pumps the right choice.

“On the other hand, fully automatic self-priming diesel centrifugal pumps are the de facto choice for delivering fast dewatering solutions to sites where an alternative power source, such as a generator or mains feed, is not available,” says du Toit.

He highlights the performance of dewatering pumps as a fourth point to consider. Submersible pumps can provide days of unattended dewatering operations – even in the toughest environments where the water table needs to be lowered.

“They will also have less noise impact on the immediate environment, so they can be run during the night even in densely populated areas without causing any disturbance,” he said. “Some models can run for up to 2,000 hours without needing attention, and can even sustain dry running conditions.”

Atlas Copco centrifugal pumps have fuel autonomy of around 40 hours, and can continue to operate even when significant volumes of air are introduced. They can run in these ‘snore’ conditions as a result of an oil-free diaphragm vacuum pump’s automatic priming. Extra-large fuel tanks can allow them to run for longer periods without refuelling.

The fifth factor in selecting pumps is the maintenance and service, says du Toit. Atlas Copco’s electric submersible pumps are extremely durable and offer high wear resistance. The modular construction of these types of pump provides for simplified maintenance procedures – with some models equipped with on-site servicing and parts replacement kits, including seals and impellers.

“Maintaining centrifugal pumps is also easy and simple, with the exception of replacing wear parts and engine filters,” he concludes. “An important feature of this type of equipment is the inclusion of advanced controllers with data monitoring capabilities; these can alert the owners or operators when service interventions are required.”

Proper Support: A Look at Blackmer’s Between-the-Bearing Design on E Series Magnetic Drive Gear Pump


By Michael Coburn – Product Manager for Blackmer® Gear

Shaft deflection
Pumps are an essential piece of mechanical technology critical to the function of many industries.  The need to move fluids stretches back to 6000 B.C. in Egypt and Mesopotamia when early civilizations dug canals to move flood waters to crops for irrigation.  The earliest evidence of a pump dates to 2000 BC, while modern positive displacement pumps like vane and internal gear came along in the late 1800’s. Throughout human history, pumps and the movement of fluid have been crucial to survival and progress.

While pump technology is designed with longevity in mind, there are common problems that can knock them offline and even cause catastrophic failure. One of those problems is the deflection of components in and around the pumping chamber. Deflection occurs when the effects of pumping forces on the rotor causes the shaft to bend.

Pumps are designed to deal with some level of deflection during rotation, but it can become severe or catastrophic when the shaft does not have adequate support. Shaft deflection, if left unaddressed, can create larger problems, such as bearing damage and failure, mechanical seal leaks and failure, excessive vibrations, premature and excessive component wear and failure, and even broken shafts.

But shaft deflection doesn’t have to be a catastrophic problem, so long as the pump apparatus provides proper support across the shaft. This whitepaper looks at Blackmer’s E Series patented between-the-bearing support system as part of their seal less mag-drive internal gear pump, specifically how it minimizes deflection to keep the pump and its critical components running longer.

Strong support system
Blackmer’s between-the-bearing support system uses an eccentric spindle supported at three crucial points – the head, the crescent location and the back of the containment canister.  In addition to the three main points of contact, the spindle system includes two radial bushings and a thrust bushing.  Once installed it sits stationary in the pump while the rotor turns around it.

Instead of mirroring the design of competitor internal gear pumps, which default to a longer shaft and overhung load, the eccentric spindle features a shorter shaft, larger diameter and three bushings. These elements ensure that hydraulic forces are supported across the spindle rather than centered on the weakest points. Working together this spindle system is designed to virtually eliminate the deflection issues typical of traditional cantilevered load designs.

The traditional cantilever design on internal gear pumps has support shortcomings across the shaft. The typical bushing placement is near the rotor, with a single bearing on the other end of the shaft. This leaves the remaining segments of the shaft poorly supported, allowing those areas to suffer deflection during operation or upset conditions leading to premature component wear and failure.

With Blackmer’s between-the-bearing support system, a staple on its E Series Seal-less Magnetic Drive Internal Gear Pumps, extended radial bushings support the entire length of the rotating element spread out across three spots, which minimizes deflection and maximizes the life of the bushings.

With this support system and the 2 in. (50.8 mm) spindle design (on our 3” 69 size pump), deflection is minimal to the tune of 0.005 in. (0.13 mm). Comparatively, using the same pump size, deflection in one 0.44 in. (11.1 mm) shaft deflects 0.056 in. (1.4 mm). That amount of deflection in the traditional setup is prone to causing rotor and casing wear/contact, head wear and early shaft seal failure. Premature wear with the between-the-bearing support system is nonexistent.

Conclusion
Pumps are an effective technology, but they are only as effective as their design and the performance that stems from it. Without proper shaft support, internal gear pumps are bound to suffer from deflection and all the problems that come from it, including rotor or shaft failure. These problems, especially repeated over time, create unnecessary downtime and costly repairs, as well as lost revenues.

With the Blackmer E Series Seal-less Magnetic Drive Internal Gear Pump between-the-bearing support system, operators have one less common pump pitfall to worry about and can focus on keeping their industrial processes functioning optimally for longer periods of time.

How to install irrigation pipes for your farm


Irrigation is an essential part of modern agriculture. Proper irrigation can help increase crop yields and ensure a consistent supply of water to plants, even in times of drought.

Installing irrigation pipes is a crucial step in building an effective irrigation system for your farm. In this article, we will go through the step-by-step process of how to install irrigation pipes for agriculture.

Step 1: Choose the Right Irrigation Pipe
Choosing the right irrigation pipe is crucial to ensure that the water reaches the plants efficiently, consider the following when choosing your irrigation pipe:

  • Material: The most common materials used for irrigation pipes are PVC, polyethylene (PE), polypropylene (PP), and polybutylene (PB). PVC pipes are durable, easy to install, and resistant to chemicals and UV rays. PE pipes are flexible and can handle high-pressure systems. PP pipes are resistant to high temperatures and chemicals, making them suitable for industrial and agricultural applications. PB pipes are
  • Size: The size of the irrigation pipe depends on the flow rate and pressure required for your crop. A pipe that is too small can reduce water flow and affect crop yield, while a pipe that is too large can waste water and energy.
  • Thickness: The thickness of the irrigation pipe affects its durability and resistance to pressure. Thicker pipes are more durable and can handle higher water pressure.
  • Cost: The cost of the irrigation pipe depends on the material, size, and thickness. PVC pipes are generally the most affordable option, while PE pipes are more expensive.
  • Environment: The type of soil, climate, and terrain in your farm can affect the choice of the irrigation pipe. For example, PVC pipes are susceptible to damage from UV rays and high temperatures, making them unsuitable for areas with high heat and sunlight exposure.
  • Maintenance: Consider the maintenance requirements of the irrigation pipe. PVC pipes require minimal maintenance, while PE pipes may need periodic replacement due to wear and tear.

Choosing the right irrigation pipe is crucial to ensure that your crop receives adequate water supply and improve crop yields. Consider the material, size, thickness, cost, environment, and maintenance requirements when selecting the irrigation pipe for your farm. Consult with an irrigation expert or supplier to help you choose the right irrigation pipe for your specific needs.

Step 2: Measure and Mark the Layout
Before you start digging trenches for the irrigation pipes, you need to measure and mark the layout of your irrigation system. This will help you determine the pipe length, depth, and the location of the irrigation valves and sprinklers. Use flags or stakes to mark the location of the sprinklers, and measure the distance between them to determine the pipe length. Plan the layout to ensure the water is distributed evenly throughout the crop.

Components of modern irrigation systems

Step 3: Dig Trenches
Digging trenches is the most time-consuming part of installing irrigation pipes. The trenches should be deep enough to bury the pipes underground and wide enough to provide space for the sprinklers and valves. Use a trenching machine or shovel to dig the trenches. Make sure to remove any rocks or debris that can damage the pipes. The trenches should follow the layout that you marked in the previous step.

Step 4: Lay the Pipes
After digging the trenches, it’s time to lay the irrigation pipes. Start by placing the pipes in the trenches, making sure they fit securely and snugly. Connect the pipes using the appropriate connectors, such as couplings, tees, and elbows. Use PVC glue or adhesive to secure the joints and prevent any water leakage. Make sure to connect the pipes to the sprinklers and valves according to the layout you marked earlier.

Step 5: Install Valves and Sprinklers
Valves are an essential component of the irrigation system, as they control the water flow to the sprinklers. Install the valves at the point where the main pipe connects to the lateral pipes. Make sure to install the valves above ground level for easy access. The sprinklers should be installed at a uniform distance from each other, and the water flow rate should be adjusted to ensure uniform water distribution. You can use different types of sprinklers, such as rotary, impact, or spray sprinklers, depending on the crop and the soil type.

Step 6: Test the System
After installing the irrigation pipes, valves, and sprinklers, it’s time to test the system. Turn on the water and check for any leaks, water pressure, and uniform water distribution. If you notice any leaks or low water pressure, fix them immediately. Also, check the water flow rate and adjust the sprinklers to ensure that water reaches every plant in the crop. Testing the system will help you identify any issues before planting, ensuring that your crop receives adequate water supply.

Step 7: Cover the Trenches
After testing the system, cover the trenches with soil and pack it tightly to prevent any damage to the pipes. Make sure to leave a few inches of soil above the pipes to allow for future repairs or maintenance. You can also use a layer of mulch to prevent soil erosion and improve water retention.

Finally, installing irrigation pipes is a crucial step in building an efficient and effective irrigation system for agriculture. Choosing the right irrigation pipe, measuring and marking the layout, digging trenches, laying the pipes, installing valves and sprinklers, testing the system, and covering the trenches are the essential steps in installing irrigation pipes. Proper installation will ensure a consistent supply of water to your crop, improve crop yields, and save water and time. By following these steps, you can install an effective irrigation system for your farm and contribute to sustainable agriculture.
